How to Fix Spots on Plant Leaves
Healthy plants and beautiful foliage go hand in hand. Leaf spots are warnings that something's gone wrong. Spots on plant leaves happen for many reasons, but quick intervention can stop spots from spreading and prevent their return. By understanding the causes behind leaf spot problems, you can get your plants back on course.
- Leaf Spots From Fungal Diseases
- Leaf Spots From Insects and Mites
- Leaf Spots From Poor Nutrition
- Leaf Spot Prevention and Repair
Leaf Spots From Fungal Diseases
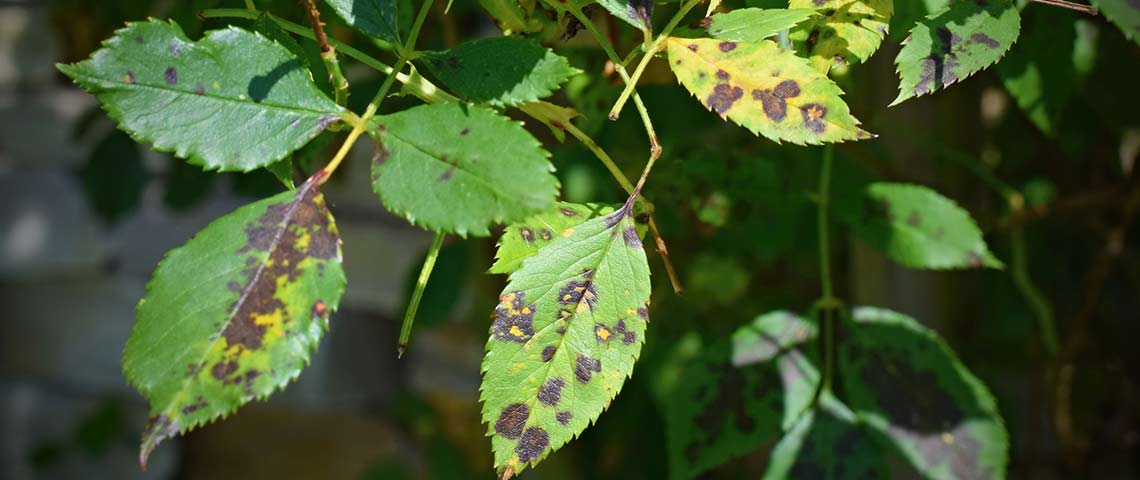
Fungal diseases are the leading cause of leaf spots. As soon as you suspect trouble, inspect your leaves for moving insects. Then look closely at the spot itself. Spots due to fungal disease may have soft, wet-looking centers or signs of fuzzy fungal growth. Most fungal pathogens spread by wind or splashing water, so leaf spots from fungal disease have random spacing. The longer they're present, the larger spots grow.
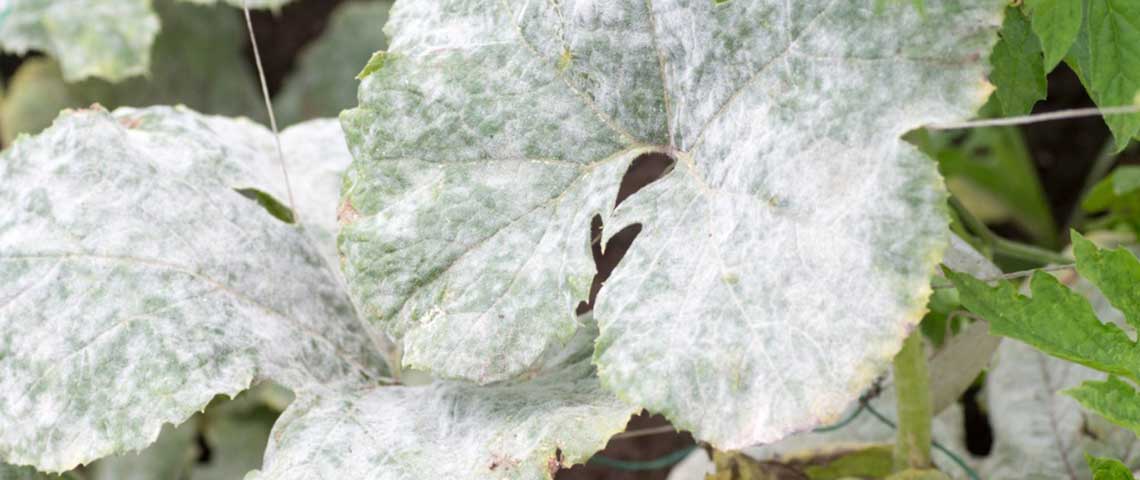
Leaf spot colors differ depending on the fungal pathogens involved. White spots on cucumbers and zucchini squash point to powdery mildew, while yellow spots can be byproducts of downy mildew. Black spots on rose leaves suggest black spot disease, which only affects roses. Brown spots on hydrangea leaves may indicate Cercospora leaf spot, while tomatoes with yellow and brown leaf spots can signal Septoria leaf spot has hit.
Once fungal diseases are active, they're more challenging to control. Prevention is crucial to stopping these leaf spots. Daconil Fungicide Ready to Use and Daconil Fungicide Concentrate provide rain-proof, three-way protection to prevent, stop and control over 65 plant diseases, including leaf-spotting problems. Treat early in the season to prevent diseases before they start or at the earliest sign of fungal spots. Always take houseplants outdoors for treatments. Make sure they dry well before they come indoors.

Dark spots on tomato leaves may signal infection from a fungal disease
Leaf Spots From Insects and Mites
Many insects chew large holes in leaves. But smaller sucking insects pierce leaves or scrape leaf surfaces, creating tiny holes that become leaf spots. Leaf spots caused by insects and mites often follow patterns. Spots may be concentrated toward leaf edges or on one leaf section. A close look at both sides of spotted leaves may reveal the pests as they work. You may find old skins from molting insect nymphs or spots of excrement, too.
Leaf spots from insects can vary significantly. A magnifying glass can come in handy when you're investigating leaf spots for pests. White spots on houseplants, including indoor lemon trees, may come from mealybugs or whiteflies. Silvery spots or tiny black specks that mottle the leaf undersides can signal thrip infestations. Yellow and brown leaf spots may indicate spider mites are feasting on your outdoor or indoor plants.
When insects are behind your leaf spots, a broad-spectrum insecticide such as Sevin Insect Killer Ready to Spray and Sevin Insect Killer Concentrate can take care of multiple pest problems at once. These products kill more than 500 insect pests by contact, then they keep protecting against spot-causing insects for up to three months. Spider mites aren't insects, so they need a different approach. Turn to Sevin Sulfur Dust to kill mites and give your plant 2-in-1 pest and disease protection. Whenever using pesticides on houseplants, move plants outdoors for treatment.

Damage from insects or mites can spot and discolor plant leaves.
Leaf Spots From Deficient Nutrients
When plants lack enough of certain essential nutrients, those deficiencies can show up as spotted or discolored leaves. Depending on the problem, nutrient deficiencies may discolor specific parts of leaves or entire leaves. Yellowing may become concentrated in either the newest growth or the oldest leaves. You may also see yellow spots or brown spot-like patches, especially when symptoms start.
Even when nutrient deficiencies aren't causing the leaf spots you see, poor nutrition may still be to blame. Undernourished, unhealthy plants are more prone to attacks by insect pests and plant diseases, including those that cause leaf spots. If you see discolored leaves, make sure your plant is getting the nutrients it needs.
With OMRI-listed Alaska Fish Fertilizer 5-1-1, you can give your plants a beneficial boost of nutrients. With a premium fertilizer such as Pennington Rejuvenate Plant Food All Purpose 4-4-4, you provide your plant with a balanced blend of primary plant nutrients and other essential nutrients. This helps promote beautiful foliage plus bigger, better flowers and fruit. And with Pennington Epsom Salt, you can help prevent yellow leaves due to sulfur or magnesium deficiencies and enjoy attractive green leaves again.

Some nutrient deficiencies cause yellow leaf spots and patches.
Leaf Spot Prevention and Repair
For many cases, once leaf spots appear, they're there to stay. Discoloration caused by nutrient deficiencies usually goes away with proper feeding. But spots from diseases or pests that damage or kill plant tissue stay put — unless you remove the leaf or it drops on its own in fall. When leaf spots are near leaf edges, some gardeners carefully trim spots away with sharp plant scissors. Trimming leaves an unnatural edge when it heals, but you may prefer that over spots.
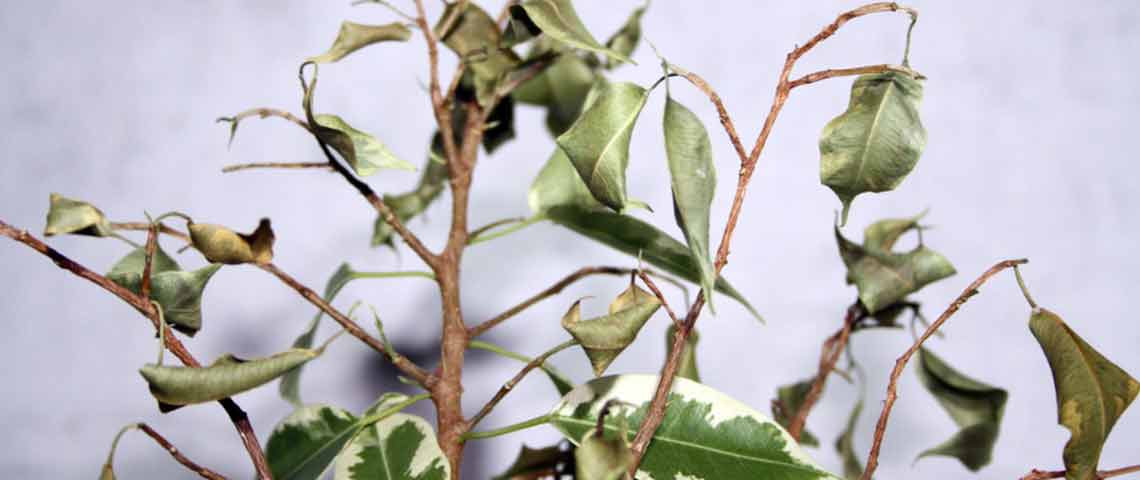
To help prevent leaf spots before they start, get in the habit of looking at leaves regularly — before you see problems. Keep houseplants away from heating ducts or air conditioning drafts that can discolor leaves. If you move indoor plants outside for summer, acclimate your plants gradually to avoid spots from sun scorch. When you water, avoid cold water that can shock plants and spot leaves. Instead of watering leaves, water the soil and avoid wet foliage that encourages fungal disease.
By staying in tune with your plant's health and appearance, you can prevent leaf spots and have healthy plants and beautiful leaves. At Pennington, we're here to help you learn about plants and plant care, so you can enjoy all the fun and satisfaction growing brings.
Always read product labels thoroughly and follow instructions, including guidelines for pre-harvest intervals (PHI) and application frequency.


